Sunday, September 30, 2007


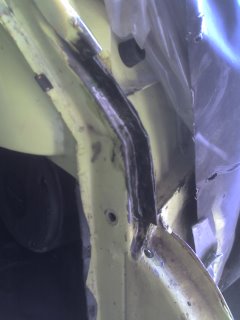
bin at it again. The rear spring hanger was a little wooly so that has been replaced. However this entails removal of some of inner wing, which leads up to the wing mounting flange. Unfortunately, when I repaired the inner wing last time (5 years ago) I thought the rear part of the flange was ok, but it wasn't, so I've prepped the area to fit the back end of the flange, and a rear inner wing repair panel.


Some of this area was quite sound, but it was made up of 6-7 different panels so rather than add to them I decided to make it all a little neater.


comment?

Sunday, August 26, 2007


Well its been a while (Again) but now we're getting there again. All the driver's side bodywork has been sorted pretty much and needs a final flat before undercoat and topcoat.

The next things to do are the rear quarter (again!) its not too bad, and I have a repair panel, but I have been there before (this is where I started - Forth bridge or what!).

I have managed to buy a super duper roof rack on ebay.
comment?

Thursday, March 01, 2007


Lots of the bodywork has been sorted, however I decided it was probably best to trial fit the new rear offside door. Lucky I did, as it didn't fit. There was something like a 3mm overlap which it quite a lot when its supposed to be a straight swap!


The answer, it turned out, lay in the hinges. The ones from the new door were a slightly different design and which kicked the back of the door out by that 3mm. Once swapped, everything was fine, well better. It was still a little proud, and all t
he bashing made me realize that the end of the gutter was not as fresh as it should be, so a piece had to be made and that was sorted.


The next things on the list are: finishing the welding on the new rear door (the old one was far too bad - see previous posts). Sorting out a front door (new or old decisions decisions..), lots more flatting. I have pretty much decided to get a proper re-spray done, so I'll really just need to do all the filling and priming I think. I'll have to get the interior sorted at some point too.

After this little lot is done, then there is the near side rear door (more of the same I'm afraid). The spare one looks remarkably good, but I'm sure that is not the case!

Will we be on the road for the summer? Not at this rate we won't!


comment?

Sunday, January 07, 2007

after lots of swearing and cut fingers I've finally managed to get all the welding done, and get cracking on the pretty stuff. This is really quite a small quantity of filler and lots of sanding/flatting. I have got a couple of conflicting views on this 1) filler and primer are porous so always dry sand 2) dry sanding clogs really easily and is a waste of time so wet sand . I went for option 2...

This bit always takes ages, and I'm never happy with it. I have considered getting it done by a pro, but it is rather expesive. so far it as been pretty good. I'm now working on the rear arch (double curvature so really tricky) the guter (fiddly) and the windscreen aperture (should have done it properly last time...)

I have been having problems getting filler and stopper to dry quickly enough. The process is usually
go into the garage of an evening, sand the filler down, look at where the blemishes are fill and then leave it for the next evening.. which means it takes AGES!


comment?

Monday, November 06, 2006

Not been too busy really, but I have been having lots and lots of fun with the offside guttering. This apears to be a really hard thing to do. It looks quite straight forward:
  1. drill out the old spot welds
  2. cut the gutter where required
  3. clean up the body
  4. weld on new gutter
  5. seal paint and drive away


however in reality it goes like this:
  1. drill out spotwelds where they aren't rusted away
  2. pull the rest of the gutter off (before it falls off)
  3. cut fingers on sharp steel
  4. poke bodywork with a sharp implement and watch it fall on the floor
  5. attack body with angle grinder (on the roof and under the edge of the gutter)
  6. (gulp)
  7. make up some nice little bits of steel (using cornflake box pattern)
  8. trim steel
  9. cut fingers on sharp steel
  10. butt weld steel into roof and overhang
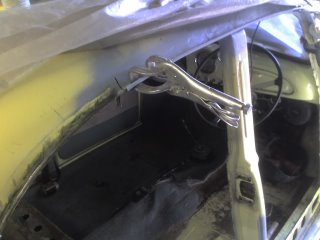
  11. grind out 'cause it looks a mess
  12. make new bits of steel (with overlaps)
  13. weld bits into car
  14. grind
  15. weld
  16. realise that the welder ain't no good upside down
  17. try again
  18. grind...
  19. yawn...
  20. weld on new gutter
  21. fill in holes blown in new gutter (see 16)
  22. cross fingers
  23. finished?
it kinda looks ok now.. but it still needs a bit of grinding, filling and general tidying up.... will post when I'm happy :o)

comment?

Sunday, August 20, 2006


so the rear door is off...and its a write off... rust all the way up the side which is a realy pain. I think I need to get some better ones. Aparently this is not normal behaviour for rear doors (I asked the oracle). So if anyone out there in minorland has a pair of doors going (I might as well get the other one sorted too) please let me know. I'm in Scotland so there may be an issue with location :o)


And the b pillar provided much hilarity (for those of you who thaught I should have scrapped the car years ago...) . I knew I had to replace the bottom of the pillar, and there there was some filler in there, but I the sheer quantity! Someone must have really enjoyed filling and sanding, because oddly enough it wasn't that bad a shape (maybe a bit square), just 10mm out from where it should have been!


As for other news, the gutter is in the process of getting sorted - out with the old etc. its going well and I have lots of hte old rot out and some repair pieces made and primed ready to go in - when I find the time


comment?

Wednesday, August 02, 2006

So what has been happening recently... well little Rory was born! He's a very cute little chap and jolly goodfun, but he does take a lot of time ....
... but he does take long naps!

And of course Daria as been helping :o) I have managed to get the off side arch filled along with the boot lid, the major problem being flatting it properly. I don't seem to be able to get it sorted, I'll have another go and see what happens.

I also managed to get the rear wing fitting much better (filing hte mounting holes helped a bit too) I think if I put in a few more hours in I can get it all ready for paint pretty quickly. The priorities at the moment are the boot lid and the rear arch.

I have also been looking at the rear door which looks very holy. Thats going to come off soon for a re-build. Also the guttering is well shot so that is in the process of coming off...

so much to do
comment?